Today I’m going to share how to configure PassportJS for Oauth2 authentication. The reason to using it is pretty straightforward. We don’t want to handle authentication in our application. It’s more secure and makes the application more focus on the business functions.
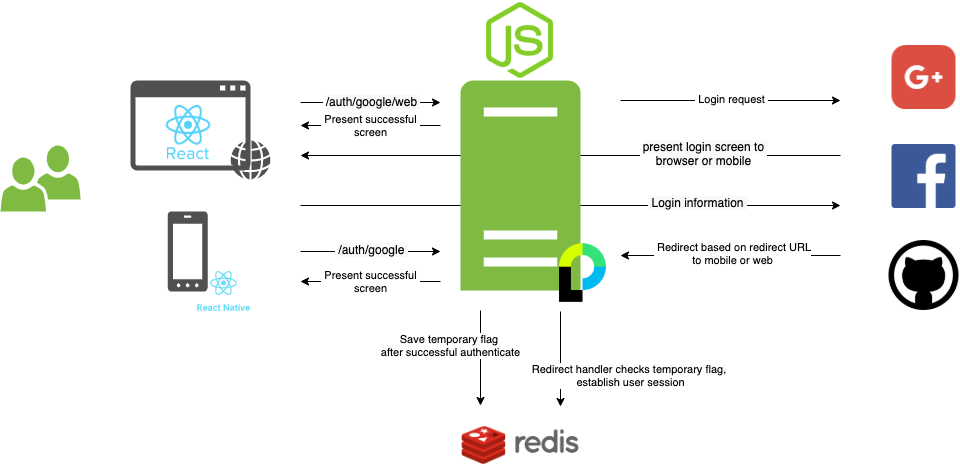
The environment I have is, I have a NodeJS application as my backend. It provides backend API functions for my two frontend. One is mobile, the other is web. The NodeJS handles oauth2.0 for both mobile and web. We will use Google as example to show how to set it up. Facebook and Github auth is similar.
Below it’s the high level diagram to illustrate all components.
Let’s start..
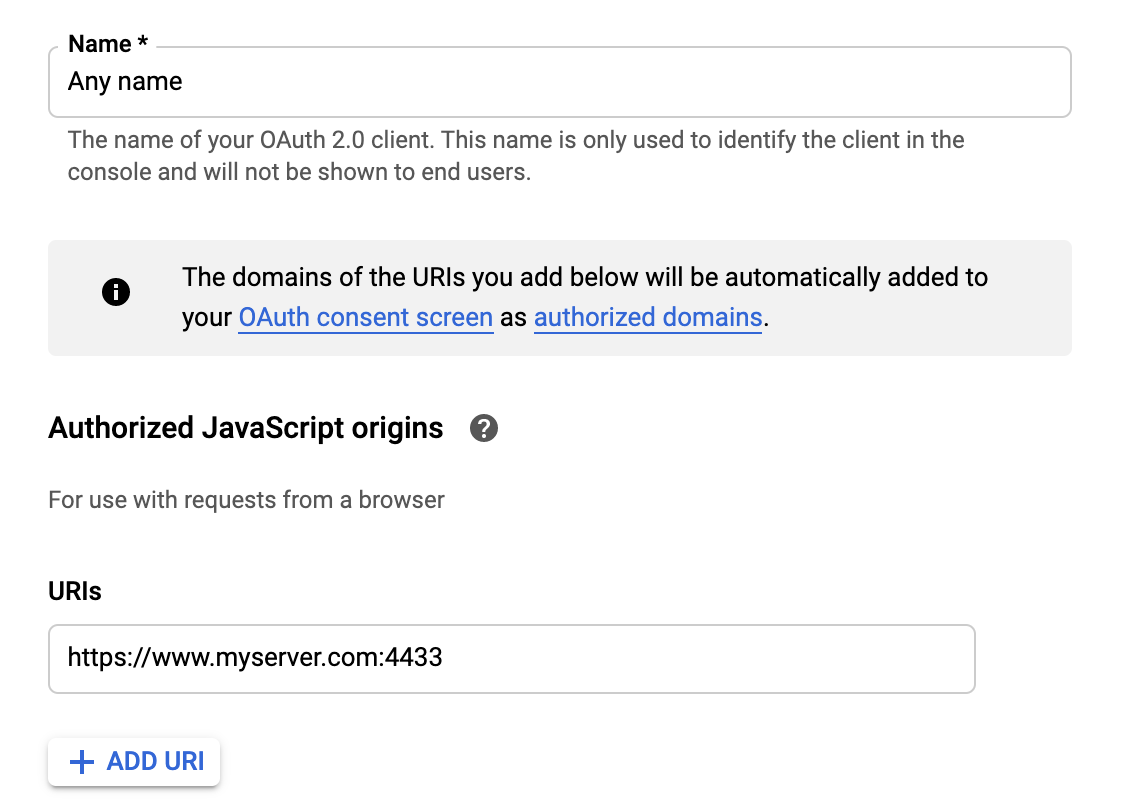
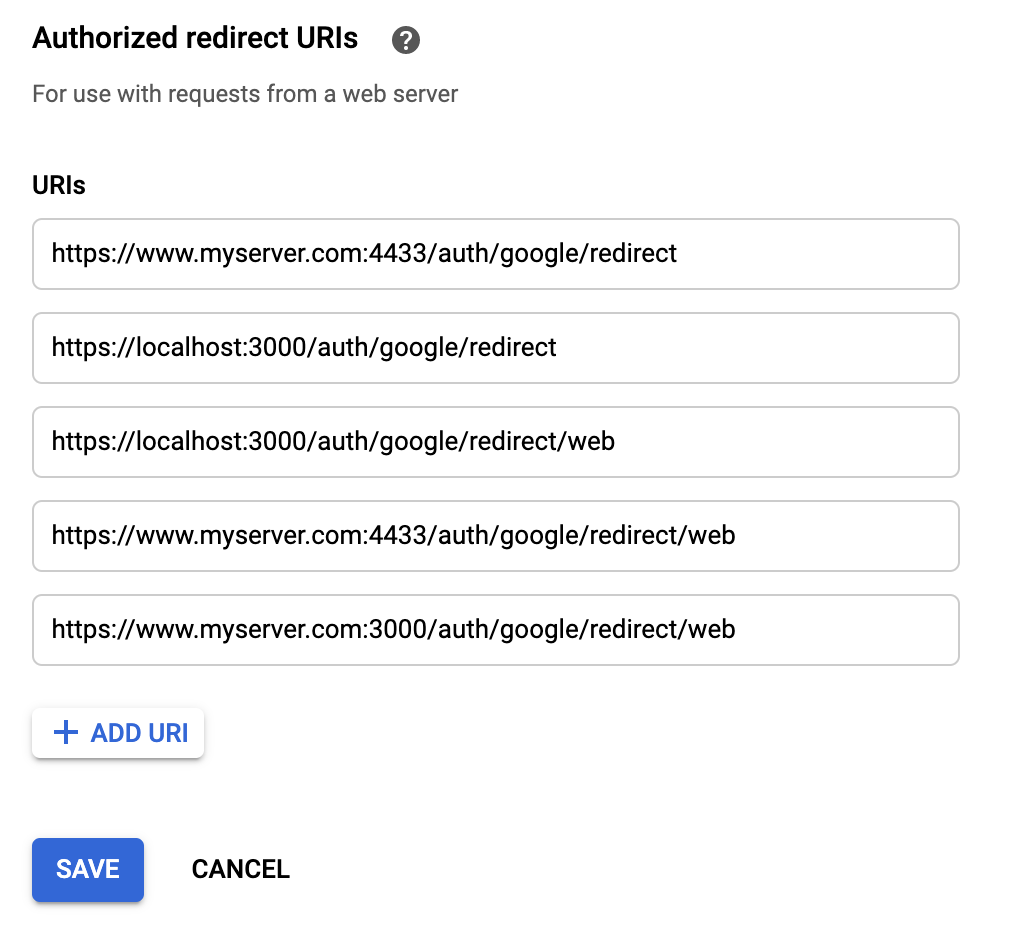
1. OAuth 2.0 Client IDs set up in Google developer console
2. Add dependency to NodeJS app
npm install passport passport-google-oauth203. Configure passportJS for Google
You need your Google client id and client secret for the configuration. My application after successful authenticated, I will create or update the user model in mongo database. If you create a separated file to store below, you need to import it in you main app.js.
var passport = require("passport");
var GoogleStrategy = require("passport-google-oauth20");
var User = require("../models/user-model");
var mongoose = require("mongoose");


passport.serializeUser((user, done) => {
  done(null, user.id);
});

passport.deserializeUser((id, done) => {
  User.findById(id).then((user) => {
    done(null, user);
  });
});

passport.use(
  new GoogleStrategy(
    {
      // Option for Google strategy
      callbackURL: "/auth/google/redirect",
      clientID: keys.google.clientID,
      clientSecret: keys.google.clientSecret,
    },
    (accessToken, refreshToken, profile, done) => {
      // Check user exists?
      User.findOne({
        googleId: profile.id,
      }).then((currentUser) => {
        if (currentUser) {
          if (currentUser.thumbnail !== profile._json.picture) {
            currentUser.thumbnail = profile._json.picture;
            currentUser.save().then((user) => {
              done(null, user);
            });
          } else {
            done(null, currentUser);
          }
        } else {
          console.log("Profile: " + JSON.stringify(profile));
          new User({
            _id: new mongoose.mongo.ObjectId(),
            userName: profile.displayName,
            googleId: profile.id,
            firstName: profile.name.givenName,
            lastName: profile.name.familyName,
            thumbnail: profile._json.picture,
            email: profile.emails[0].value.toLowerCase(),
          })
            .save()
            .then((newUser) => {
              done(null, newUser);
            });
        }
      });
    }
  )
);
4. Configure routes to handle Oauth2
Routes redirect to Google for authentication. I have two routes to handle mobile and web differently. The call back URLs for mobile and web are different. Because the handler for mobile and web is different after successfully authenticated by Google.
//auth with google - mobile
router.get(
  "/auth/google",
  passport.authenticate("google", {
    scope: ["profile", "email"],
  })
);

//auth with google - web
router.get(
  "/auth/google/web",
  passport.authenticate("google", {
    scope: ["profile", "email"],
    callbackURL: "/auth/google/redirect/web",
  })
);
Call back handlers for mobile and web. The handler will redirect to above routes if failed the authentication. If successful, it will write to session to indicate the user has been authenticated. And it’s short live (expires in 5 seconds) because the the redirect will happen right away. The following process will check this information to make sure the user is authenticated by Google. You can’t establish the session here is because this is redirect from Google, the domain is different from my mobile and web domain. After creates the session attribute, it redirects to mobile or web for further processing.
// Callback route for google - mobile
router.get(
  "/google/redirect",
  passport.authenticate("google", { failureRedirect: "/auth/google" }),
  (req, res) => {
    client.set(req.user.id, "loggedIn", "EX", settings.redis.tokenExpire);

    res.redirect("MyApp://login?userid=" + req.user.id);
  }
);


// Callback route for google - web
router.get(
  "/google/redirect/web",
  passport.authenticate("google", {
    failureRedirect: "/auth/google/web",
    callbackURL: "/auth/google/redirect/web",
  }),
  (req, res) => {
    client.set(req.user.id, "loggedIn", "EX", settings.redis.tokenExpire);

    res.redirect(WEB_REDIRECT_URL + "?userid=" + req.user.id);
  }
);
5. Callback redirect to the handler for after login
As we mentioned above, this handler will get the request, and create the user session and continue. It’s important to check the short live attribute before you establish user session. If you don’t check that and it’s called, it will just create the user session without passing the authentication. And that’s it.