There are many cloud providers provide web hosting. Some are cheap but provide limited functions. Some are powerful like AWS, PCF, but there is some cost. Although it considers not that expensive. However if your website doesn’t generate any revenue, you might not want to pay for it. You have another choice to host it yourself.
In order for other people to be able to access your web server, the first thing you need a domain name. The domain name will need to be translated into a IP address. IP address is assigned by your ISP to your device and it’s unique across the entire internet. However the IP address might be changed from time to time. This is called dynamic IP. They explain because not enough IPs for everyone so they make it a pool for sharing. When you are not using, your IP will be released for someone else. Next time you will get a different IP. I think in old days when you are using dial in modem, that made sense. But now we connect to internet 24/7. You do have a choice to select static IP, however it costs more. To solve this problem, you can use a service called DDNS (Dynamic DNS). There are quite a few free service providers. One is called NOIP. It has a lot of subdomains you can choose. For free account, you can get up to 3 domains. You also will need to confirm your domain names every 30 days. It will send remind email to you. And the confirmation is quick and easy. Some routers already have DDNS set up. You can use those as well. To set up the DDNS, you need to register an account. After that, you configure your client to report your IP address to it. So it can translate the domain name to your IP address. If your router already have DDNS, you might just need to put your register account information. Or you can also install a client in your server. It does similar things, regularly report your IP address to DDNS provider.
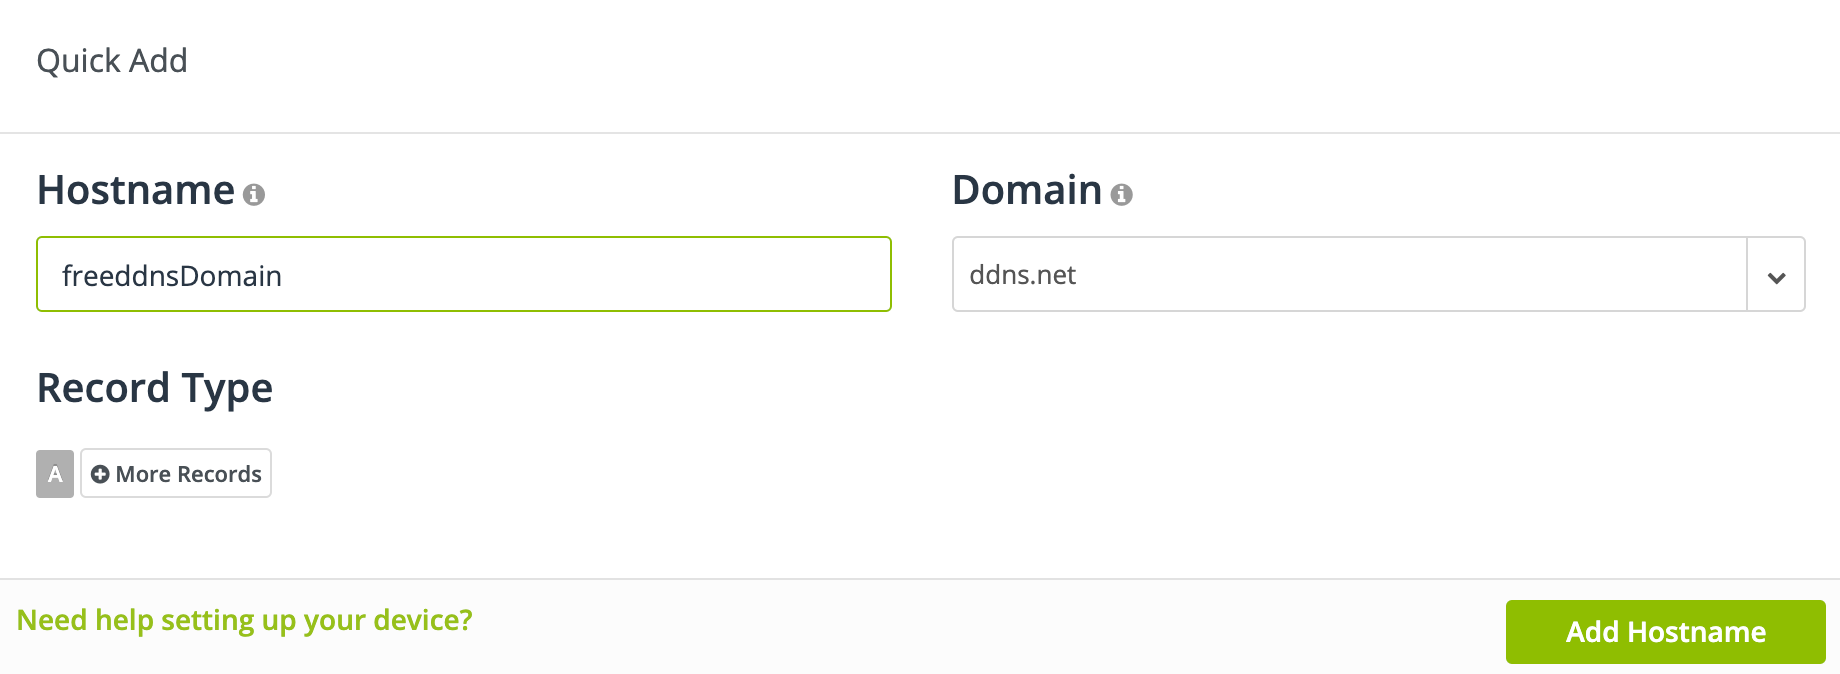
If you don’t like the domain name from DDNS, you can get your own domain name. Like I got one from Google, it costs $17 per year. Then you can configure your Google domain to the DDNS domain name. For Google, under DNS, you can create CNAME mapping.

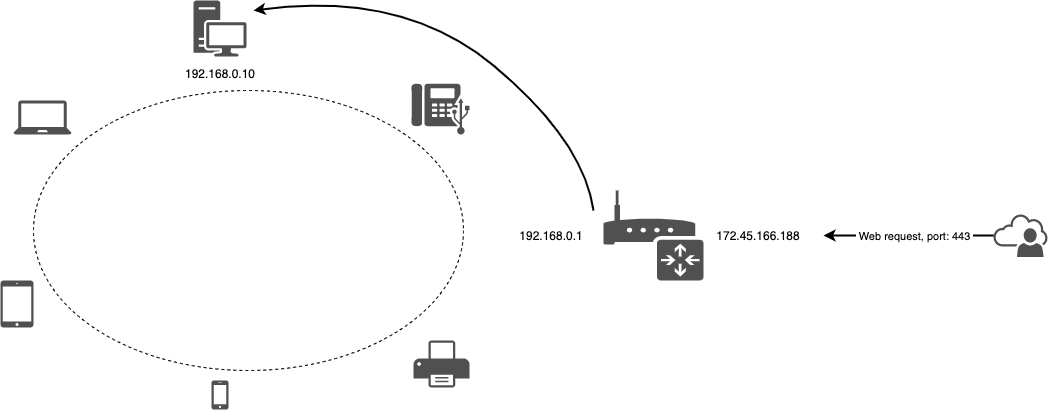
Once you have your domain set up, people from internet using your domain name, they can reach your public IP address. You need to configure your router so the web request can reach to the right server in your LAN. You can set up port forwarding to forward different requests to the right machine in your LAN. Basically you create the mapping to tell your router, if there is a request from outside (WAN) to port 443, please route the traffic to the machine (IP is 192.168.0.10) in the LAN, port 443. Machine’s port and WAN port don’t have to be the same. One important thing is, you only open the port you need. Otherwise you are inviting hackers to hack your network.

These days when you set up a web site, you will want to set it up as HTTPS. For very obvious reason, you want to make your connection secure. In order to do that, you need a legit certificate, which it’s accepted by most browsers. You can create self-signed certificate. However browsers will flag it as risk since they don’t recognize your certificate. You can apply a certificate for your domain from letsencrypt.org. It’s a nonprofit certificate authority.
You can apply the certificate with the same name as your domain. Letsencrypt needs to verify you own the domain. Couple ways to do it but I prefer to use temporary web server. Before you start, you need to install certbot to your server. You also need to configure your router to port forward 80 to your server. If you have firewall, make sure the port is allowed.
$ sudo certbot certonly --standalone --preferred-challenges http -d myNiceDomain.awesome.comOnce you run the command, it will create the certificate under folder /etc/letsencrypt/live/myNiceDomain.awesome.com. Four files will be created, cert.pem, privkey.pem, fullchain.pem and chain.pem. You can use them to configure your web server for supporting HTTPS connection. Certificate expires every 90 days. You will receive reminding email when close to expiry. You can create a shell script command to renew the certificate.
#!/bin/bash

cd /etc/letsencrypt/live/myNiceDomain.awesome.com
certbot renew --force-renew
Now your web server is accessible from internet.